|
| Home | About
Us | Moderators
| The
Prey | Articles
| Techniques
| Tech
Section | Product
Reviews | Sponsors
| Links |
Contact
Us | The
Predator Masters Forums | Photo
Gallery | Scholarships
|

By LeRoy M. Benson (aka: Silverfox)
|
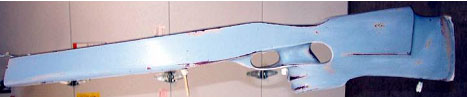
Although this article will be about camouflaging only the rifle stock, I am sure some of you will want to go the whole 9-yards and camo the whole rifle. With that in mind, I will try to add suggestions on what to do if you want to camouflage the whole rifle, including the scope, action, and barrel. One of my project rifles has camo paint on all parts except the scope and it has worked out great. For some reason I am reluctant to spray paint a scope that is worth $500 to $1,000. However, if you are going all out and want your equipment to be as invisible as possible, you may have to bite the bullet and paint your scope, rings, and bases, along with the stock and barreled action. The first step in this project was to pick a spot where I could work in an environment that was fairly dust free. Next, I tried to find an area where any paint overspray would not damage anything like the painted surface on my car/pickup, lawn mowers, ATVs, motorcycles or any other thing sitting in the work area. Move all that stuff out of the work area for the duration of your project. Another suggestion here is to find a spot where there won't be numerous people, any cats, dogs, or kids running around and rubbing against your work of art. The work area should have a good source of light so you can see what you are doing and some ventilation so you don't breathe too many paint fumes. (You don't want to fry your brain on paint fumes.) My first step in doing a camouflage paint job on my stock was to remove the barreled action from the stock. The stock in the illustrations is a synthetic HS Precision thumbhole stock with aluminum pillars. I customized portions of the stock when I first received it because it didn't quite fit my Remington 700 BDL action. I cut off the bottom of the grip area to shorten it a bit, used body putty to fill in imperfections, sanded the whole stock, and then used the old red primer often used on auto bodies for the first primer coat. For the finishing coat I used a gray color and that is what you see on the stock to the right. In preparation for the NEW camouflage paint job, I sanded the old paint job lightly with 220-grit sandpaper and then used a rag dampened with acetone to clean off the sanding dust and any a portion of the old paint that wasn't real stable. I did one more sanding with 400-grit sandpaper and used a rag dampened with acetone to do the final cleaning before painting. (A word of caution here about using acetone or mineral spirits: test the acetone or whatever you use to clean off the oil, finger prints, old paint, etc. from the stock on a part of your stock that isn't critical, like the inside of the barrel channel. Acetone will dissolve some paints and also some of the synthetic materials from which stocks are made.) Test this first so you won't be sorry later!
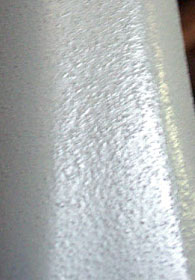
During the sanding process I actually exposed some of the raw synthetic material. The image above shows some dark red spots and those are areas of old primer and raw synthetic material. |
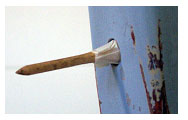 |
I decided to reprime the whole stock, inside and out, but didn't want to get any primer or paint on the bedding area of the rifle. I carefully taped off the bedding area (see the illustration below). I also taped off the butt pad, and my sling studs. The bolt holes were plugged with golf tees as illustrated to the left (see, golfing does come in handy-and to think some of you varmint hunters ridicule those of us who golf-shame on you). |
| The main reason I left the sling studs in place was to give me something to attach a wire to so I could hang the rifle stock at a comfortable working level. The sling stud in the butt of the stock was left in place and the stud in the forearm was removed and screwed in from the inside of the stock to make it hang at a better angle for painting and it also got the wire out from in front of the bottom of the forearm. The illustration below shows the bedding area taped off and ready for priming. |
 |
| The
wire I used to hang the stock with is ordinary electric fencing wire.
This is a very small gauge wire and must be inserted through the hole
in the sling stud and then wrapped back around itself so it doesn't slip
out of the sling stud hole. If you have stiffer wire, you may be able
to put a 100º angle on the end that slips through the sling stud
hole and not have to wrap the wire back around itself. If you use stiffer
wire, you will have to rig some type of swivel on the rafter end of the
wire so you can turn the stock easily. Since I had very thin wire, I just
tied the top end of the wire to a rafter in my garage. To keep the stock
from "swinging in the breeze," I would suggest finding a tall
pail, a short barrel, or some other object to rest the bottom of the stock
on to steady it. You still want to be able to turn the stock as you are
painting instead of you walking in circles around the stock. If you have
only one good source of light, it will be especially important to be able
to swivel the stock so you can make good use of that light. I am 100%
Norwegian and most of my painting was done as I walked around the hanging
stock, however, I had very good lighting from all angles in my garage.
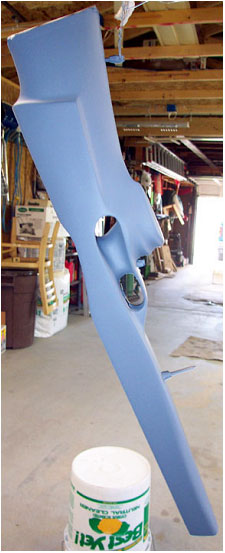
I used
Krylon #1318 All Purpose Primer Gray for the priming paint. The illustration
to the right is of the left side of the stock after I had completed
the final coat of primer.
|
 |

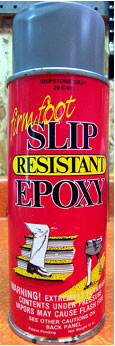 |
My
HS Precision Thumbhole stock has a very wide forearm and with just ordinary
paint on it the stock is slippery in the wintertime, especially when you
have gloves on. To make the forearm easier to grip I found some Firm Foot
Slip-Resistant Epoxy in a gray color (see the can image to the left).
It has sand-like particles right in the paint so when you finish painting
the surface it looks and feels like course sandpaper.
|
 |
| Once
the gray primer coat was sprayed on, I let the stock hang and the paint
cure for 12 hours. I did another light sanding with the 400-grit sandpaper
on spots that I thought looked a bit rough. I wiped off the sanding dust
with a cloth moistened slightly with Acetone. The last sanding operation
probably wasn't necessary, but I wanted to make absolutely certain the
stock was as smooth as I could make it. I think it is necessary to take
your time during every step to make sure no stupid mistakes occur because
you are rushing a job. This was not a race to see how fast I could get
the job done. I sprayed on one more very light coat of gray primer. Once
again, I let the stock hang for almost a full day before going on to the
next step.
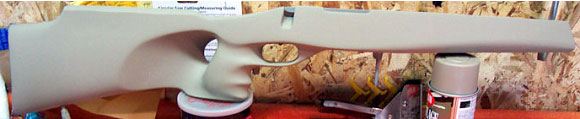
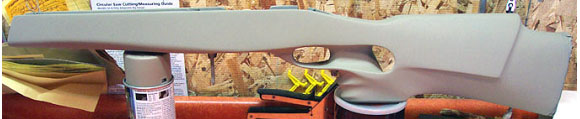
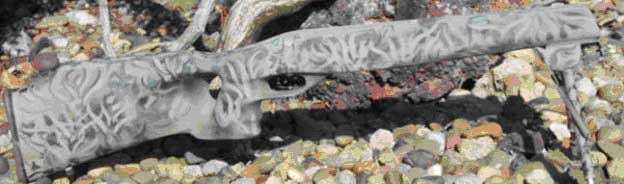
Here
are two pictures of the bottom of the stock. The top one shows the sanded
and degreased stock immediately before priming and the bottom picture
is of the stock after the final coat of primer was applied. |
 |
 |
| The next step to camouflaging my rifle stock was to paint the entire stock with the Krylon Camouflage Paint System #8141 Khaki. All of the Krylon Camouflage paints will give you a non-reflective, ultra flat finish. Click on the following link to go to Krylon's Web page to look at the color cards they have posted of the camouflage colors available. I let the paint dry for about 2 hours between the coats of Khaki paint. http://www.krylon.com/paint/ps_color_card.htm | |
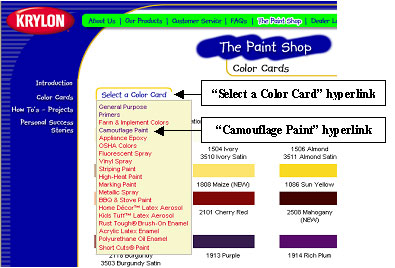 |
Once you get to The Paint Shop Color Cards page, point to the "Select a Color Card" hypertext link and then when the list pops down, go ahead and click on the "Camouflage Paint" hypertext link choice as illustrated to the left: |
| Obviously,
the colors appropriate for your part of the country or for the season
may vary from what I used on my stock. Krylon has seven different colors
available in the Camouflage Paint System. I also used one of their "Satin"
interior/exterior paints in the #3512 Sage Satin color on my stock. It
turned out to be considerably more reflective than the Camouflage Paint
System colors. I would not recommend using it because of its reflective
quality.
Below
are pictures of the right and left side of my stock after completion
of the #8141 Khaki paint application. Once again, I did two coats of
paint just to make sure I had good coverage. Both coats were fairly
light coats so I didn't get any runs or drips in the paint. |
 |
 |
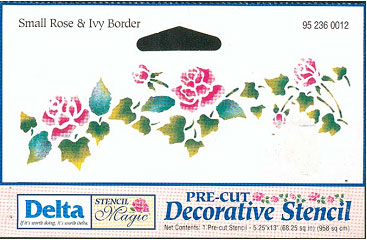
| The next step in my camouflage process was to rework a stencil I purchased at a local craft store. I bought the "Small Rose & Ivy Border" stencil #95 236 0012 made by Delta. I am sure there are many companies that make stencils you could use for your project. I didn't like the flower part of the stencil and placed tape over major portions of that part before I applied the spray paint as you can see in the picture below. I am about ready to spray the first leaf shapes with the Krylon #3512 Sage Satin spray paint. |
 |
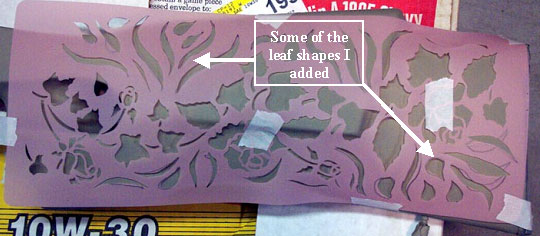 |
| The picture
above also shows some of the additional grass leaf shapes I cut into the
stencil with the tip of a very sharp knife. I just took a pencil and drew
some shapes on the stencil before I cut them out. Since the stencil wasn't
long enough or wide enough to cover the entire stock, I had to move it
from place to place frequently. I didn't cover the areas I wasn't spraying
to protect them from overspray, but I was somewhat careful and tried to
prevent getting too much overspray onto unprotected portions of the stock.
You must try to get the stencil to lay as flat as you can on the surface
you are painting or you will get too much paint spraying under the stencil.
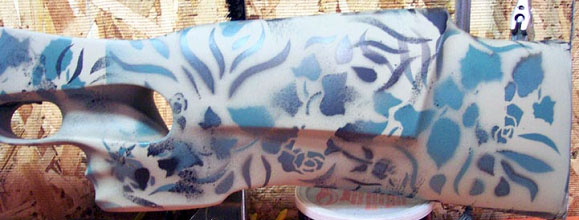
I sprayed the Sage Satin color through most of the holes in the stencil over the entire left side of the stock. Then I waited about a half hour and used the stencil and Sage Satin color to do the bottom of the stock. I didn't wait more than maybe 10 minutes after that coat before I turned the stock on its left side and did the stencil work in Sage Satin on the right side of the stock. After I finished painting with the Sage Satin color, I used some Heavy Duty Flat Black Enamel by Velspar to paint just a few random black leaf patterns on the left and right sides as well as the bottom of the stock. In retrospect, I could just as well have used the Krylon #8412 Brown color in place of the black. The brown is quite dark and I did use that color on my third pass to paint a few random leaf patterns too. Krylon also has #8147 Medium Brown and #8143 Olive Drab that could be used as well. The picture below is of the cheek piece as it looked after all three colors were on the stock.
|
| The next picture shows what I thought was the finished product's right side. However, when I looked closely I thought the leaf patterns were too stark and too dark. |
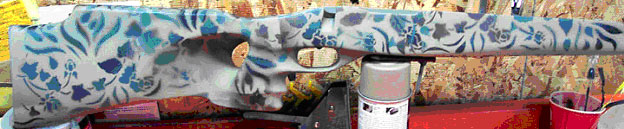 |
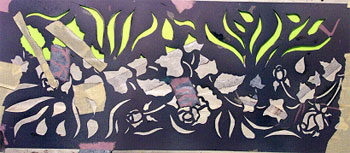
| I took the stencil and taped over the ivy patterns and left only my hand drawn leaf patterns open. In this photo below I placed a sheet of lime green colored paper behind the stencil so you can see the open areas in the stencil. All other areas have masking tape over them to prevent paint from going through those cutouts. I used the #8141 Khaki spray paint and started spraying some of |
| the long grass leaf patterns onto stock. I held the stencil on the stock and tried to spray over the extremely dark patterns made by the Sage Satin, Flat Black, and #8142 Brown. I didn't want to cover them completely; I just wanted to obscure the stark, dark look of the leaf patterns I saw in the two stock pictures above. The picture below shows the finished project. |
 |
 |
| The Harris Bipod was also given a coat of Khaki camo paint. The stencil was placed over the bipod and I used the Krylon #8142 Brown and painted a few little leaf patterns on it. Be sure you have the legs retracted on your bipod so you don't get paint on the extension part of the legs. The bipod legs would not retract very easily anymore. The picture below shows the barreled, scoped action in place and "Ready to Rock!" As you can see, it blends in quite nicely with the colors on the couch, but the accent pillows don't blend too well. |
 |
| The
action is a trued Remington 700 BDL with a light trigger spring and pull
adjusted to approximately 2 pounds. The barrel is a 26 inch stainless
steel 4-groove Lilja barrel. It has a 1 in 9 inch twist so I could be
sure it would stabilize 30 grain bullets I wanted to use on coyotes. I
had the barrel fluted to remove some of the weight because I walk and
carry this rifle for hours on end when pottin' prairie poodles. The scope
in the picture is a Taiwan made Tasco World Class Plus 8X-32X50mm with
target knobs. It came with both the 3 inch and 5 inch sunshades. That
scope is no longer on the rifle. I found the 8X magnification a bit too
much for close-in, fast moving coyotes and fox. However, the 8X-32X magnification
was terrific for pottin' prairie poodles and for punching paper! I now
have a 6X-24X Burris Signature scope on the rifle.
I'm not sure I will ever put camo paint on the scope and barrel of this rifle. The bead blasted, fluted SS barrel does not reflect a lot of light. I feel that if I don't move around as the predators approach my calling location, they are not going to notice the SS barrel. Besides, I often use a FoxPro electronic caller with a remote control and place the call about 50+ yards away from me. That usually keeps the predator's attention off of me and on the source of the sound. It gives me a "fudge factor" allowing me to get my rifle in position for the shot without spooking the animal. Make sure you follow the directions on the sides of the Krylon spray paint cans. In particular, do as they say and shake the can vigorously for 2 minutes BEFORE you begin painting and then repeat shaking the can for 10 seconds after each minute of use. You want to make sure the pigment is mixed in with the propellant for a good coverage job. Apply the paint in thin coats so you don't get runs and drips. Keep the spray nozzle 10 to 12 inches away from the surface you are painting-this helps avoid runs and drips too. If you
don't want to buy a commercial stencil or stencil blanks, I read somewhere
that stiff paper like construction paper or the paper used in file folders
will work nicely too. Some types of construction paper may be too absorbent
to really work well for you. Oh, you will probably want to let the paint
on the stencil dry before you move to another area on the stock so you
don't get wet paint smeared on areas of the stock where you don't want
it. |

|
| Home | About
Us | Moderators
| The
Prey | Articles
| Techniques
| Tech
Section | Product
Reviews | Sponsors
| Links |
Contact
Us | The
Predator Masters Forums | Photo
Gallery | Scholarships
|
© 2000-2006 Predator Masters™, All Rights Reserved. This material may not be published, broadcast, rewritten, or redistributed.
Question about the website?: Webmaster@PredatorMasters.com