|
| Home | About
Us | Moderators
| The
Prey | Articles
| Techniques
| Tech
Section | Product
Reviews | Sponsors
| Links |
Contact
Us | The
Predator Masters Forums | Photo
Gallery | Scholarships
|

Part 2
![]()
By LeRoy M. Benson (aka: Silverfox)
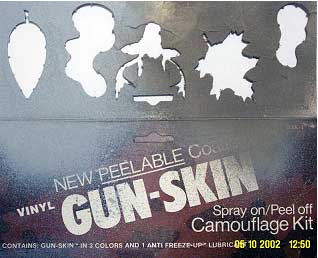
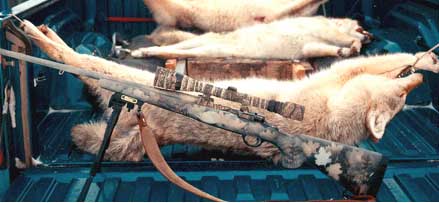
| Finally, here are a few hints on doing a camo paint job on an entire rifle. The stencil I used was from the GUN-SKIN Peelable Vinyl Coating kit I purchased many years ago. There are 4 different leaf patterns and a buck deer head on the stencil as you can see by the picture to the right. There is not nearly enough blank border on the top, left, or right-hand sides of this stencil, so to prevent overspray you must tape an extra border to the edges. The vinyl paint that came with the kit was applied to a heavy barreled Ruger .22-250. The paint turned out to be very shiny when applied to the rifle stock, barrel, and scope. It did cling to the rifle quite well though, because there was still some left on the rifle when I sold it about 10 years after painting it. |
 |
 |
The picture to the left is of a different rifle with camo paint on every-thing except the scope. This is my old M77 Ruger in .22-250 caliber. The stock is a synthetic Bell & Carlson stock. It had some camo patterns on it, but the stock and the camo patterns were quite dark and I tried to improve on it a bit. I used the Krylon #8141 Khaki and the Krylon #8149 Light |
|
Gray Camouflage paint on this stock. The same degreasing procedure I used on the HS Precision stock was used on this stock. Again, be careful and test the acetone on the synthetic stock in an area that won't be noticed like inside the barrel channel. The metal parts of the barrel and receiver should be degreased as well. I left the barreled action right in the stock because those parts of the action that were not visible while in the stock didn't need camo paint anyway. I did not remove the scope; I just placed masking tape over the entire scope to keep paint off of it. The scope was taped with camouflage bow tape after the painting was done. The camo tape I used on the scope is sold by The Allen Company, Inc. It is called "Camouflage Tape" #24 and comes in a 2 inch by 10 foot roll. The package says the tape is removable; however, it does leave a residue on the scope if removed. That residue can be removed easily with light amounts of rubbing alcohol or a product called Goo Gone. Make sure you don't get the alcohol or Goo Gone on the scope lens when trying to remove the tape residue. |
![]()
|
If you are going to put camo paint on the scope, you must protect the lens on your scope. The following information was taken from Corvus B. Custom and it suggests that you "cut a piece of cardboard, slightly smaller than the lenses and insert them into the lens area. Then use masking tape around the interior of the lens cavity (if there is room) to make sure no paint overspray gets on your lens. There is nothing that can be used to remove paint from the lenses that wouldn't also do harm to the coatings on your lens, so be careful. If you have a variable powered scope and AO adjustment, don't forget to tape those setting numbers with small pieces of masking tape. If you don't want paint on your scope, take it off." I left the bolt in the rifle and put masking tape over the bolt body to keep paint off of the bolt and out of the action. To keep paint out of the end of the barrel I took a knife and whittled the end of a pencil down to a diameter that would fit snugly into the muzzle end of the barrel. I pushed it in firmly to seal off the muzzle entirely. |
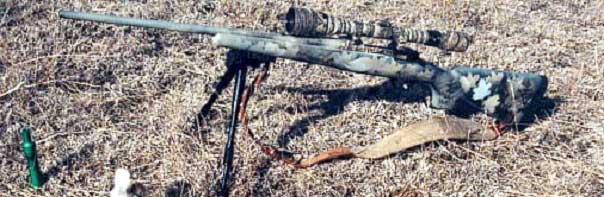 |
| I did not suspend the rifle from the rafters in the garage for this camo job; I merely placed the rifle on my workbench on a cardboard box and sprayed one side, let it dry a bit, and turned the stock to spray the other side. I did not put a coat of primer on it, nor did I paint it with a coat of Krylon #8141 Khaki paint. I would, however, do all those things if I were to camo paint this rifle again. I think the light color of the Khaki background helps hide the rifle's outline much better than the dark outline on the rear of the stock that you see in the picture above. |
| Well, I hope my ramblings will be of some assistance to those of you who are interested in taking on the task of doing a camo paint job on your rifle. It really is quite easy, but please take your time, don't cut corners, so you are sure you get the job done right the first time. I know I had a good time doing my rifles and it gives me a sense of pride to know, "I did it myself!" |
LeRoy M. Benson (aka: Silverfox)
|
| Home | About
Us | Moderators
| The
Prey | Articles
| Techniques
| Tech
Section | Product
Reviews | Sponsors
| Links |
Contact
Us | The
Predator Masters Forums | Photo
Gallery | Scholarships
|
© 2000-2006 Predator Masters™, All Rights Reserved. This material may not be published, broadcast, rewritten, or redistributed.
Question about the website?: Webmaster@PredatorMasters.com