

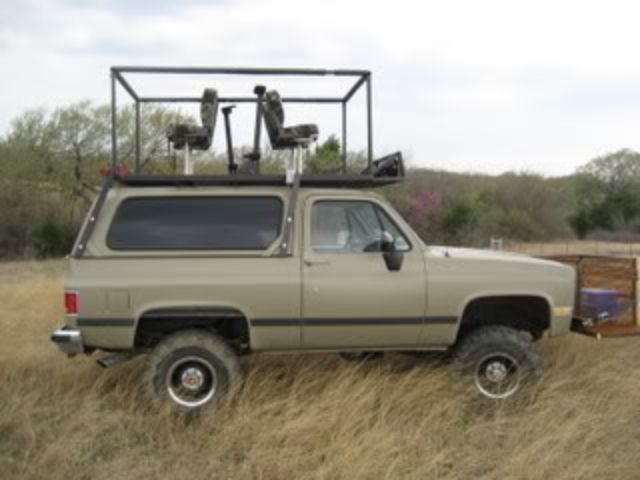
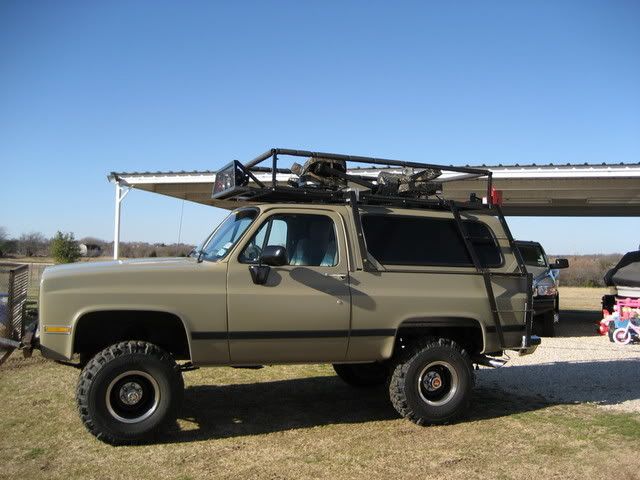
Some of you may remember my K5 Blazer. It was a great rig. I sold it to a guy who is now using it for deer surveys and some varmint hunting.
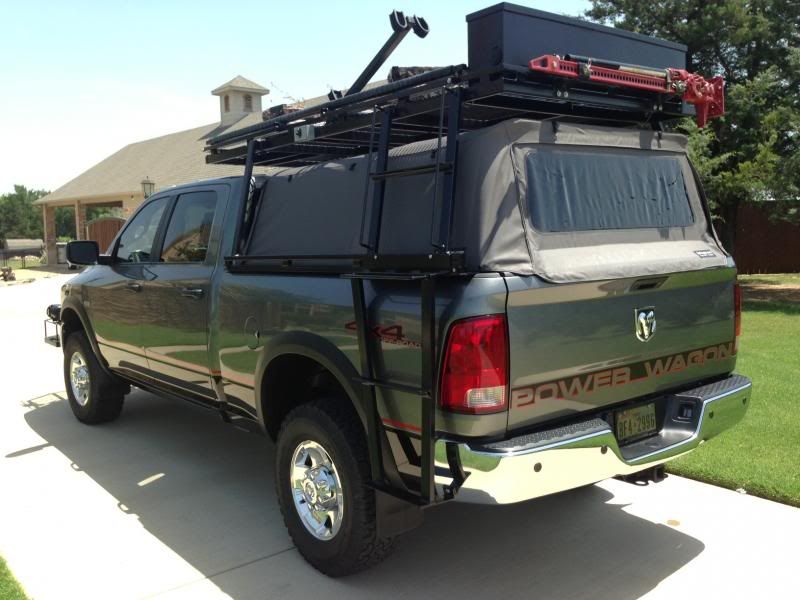
I needed rear doors for passengers and a vehicle better suited for extended ranges on the highway. I liked the design of the Blazer so I followed that idea with a pick up. Some changes were made and this one turned out better than the last. It is the ultimate varmint hunting truck especially when hunting three to four guys and using the truck year round for other hunting and daily driving. This picture shows the truck when it was almost finished. The front kill basket had a few changes made and had not been powder coated. The shooting rail was raised after a night of hunting and I was playing around in the back yard with the sway bar disconnected (electronically) and the front and rear differential lockers engaged.
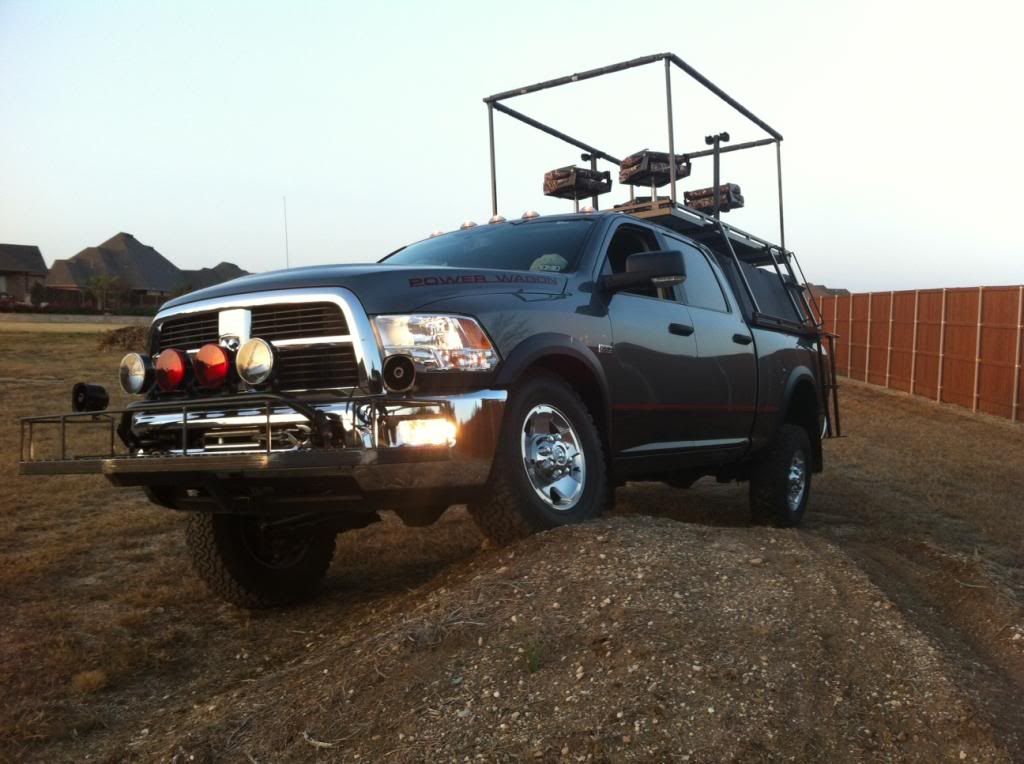
Specifications:
2012 Dodge Power Wagon SLT
Garmin based factory navigation
front and rear lockers
factory warn 12,000 lb winch
firestone air bags in rear
Soft Topper canvas soft top to keep gear dry in bed
Randy Ellis light bar with 4 light force 170's
Custom Kill basket
Custom High Rack
Custom Battery and storage box
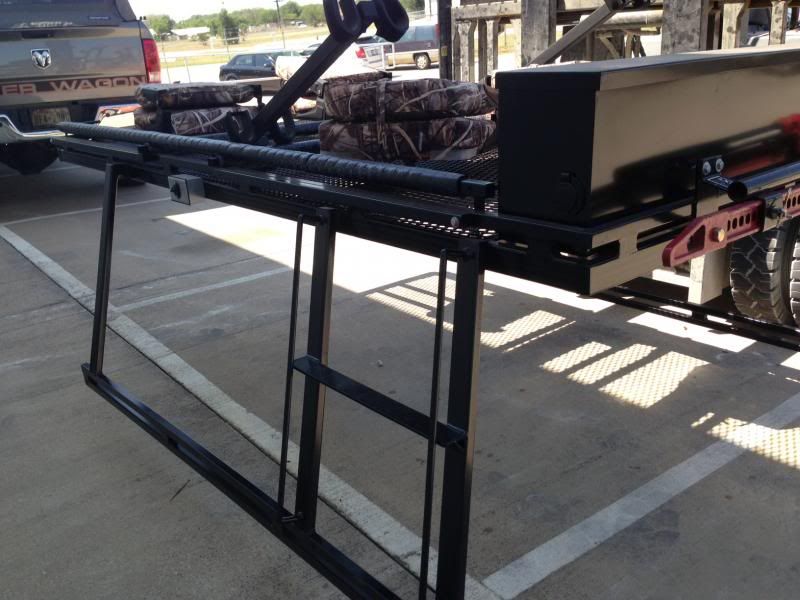
This picture is after everything was finished and the rail was taken down. It takes about 5-10 minutes to take the rail down. The Blazer needed two people to raise the rail. On the design of this rail I made each end pivot so it could fold up and down independently. The side rails are then bolted on for a 360 shooting rail. It makes a shooting rail that is super sturdy when up but compact when down. Once each end piece is folded down towards the middle the side rails bolt to the pivot points locking it all in place.
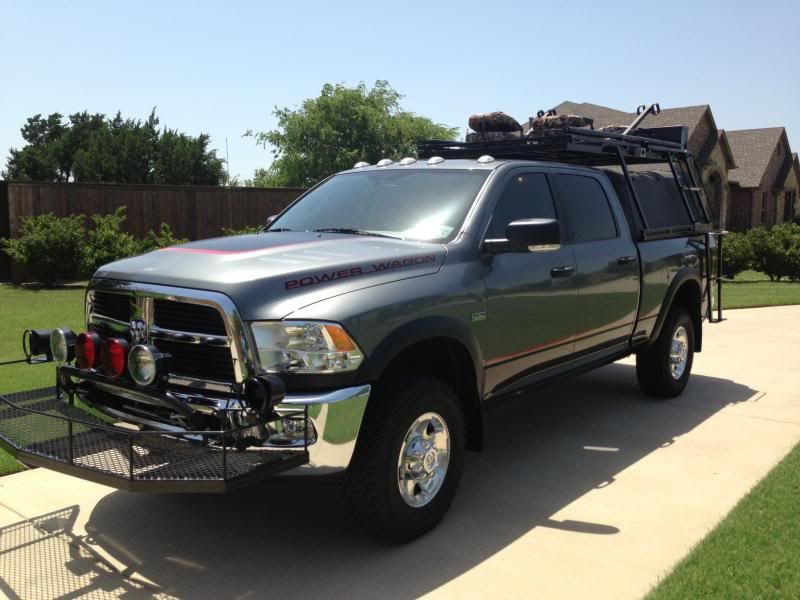
These pictures show the rail down a little closer up
It is nice to be able to take the rail up and down as needed during hunting season. I drive the truck deer hunting, bird hunting, and for daily use. I need to lower the rail to pull in the shop. I can also take the rack completely off during the summer in about 10 minutes with either a fork lift, a hoist, or 4 friends.
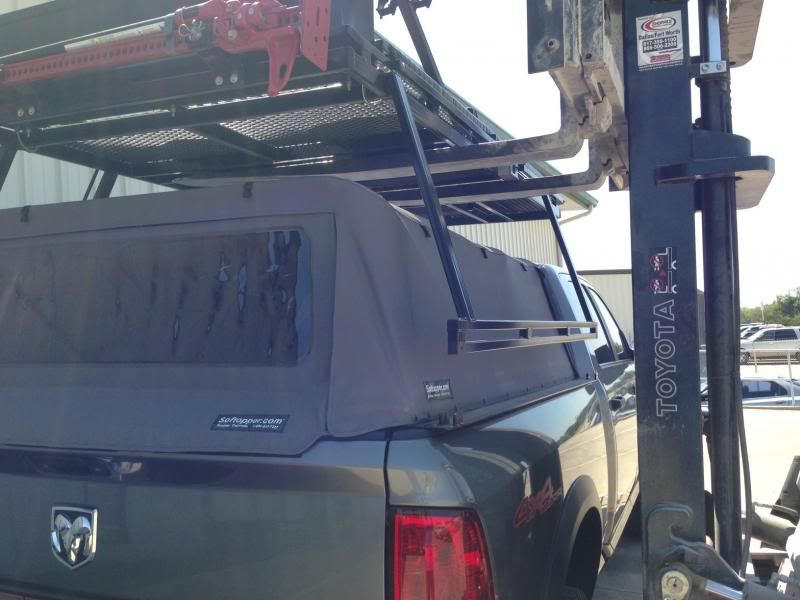
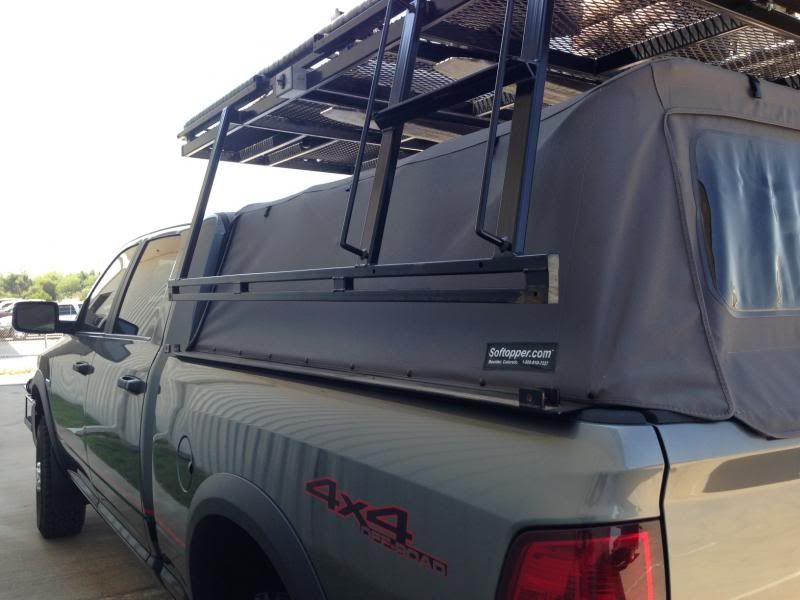
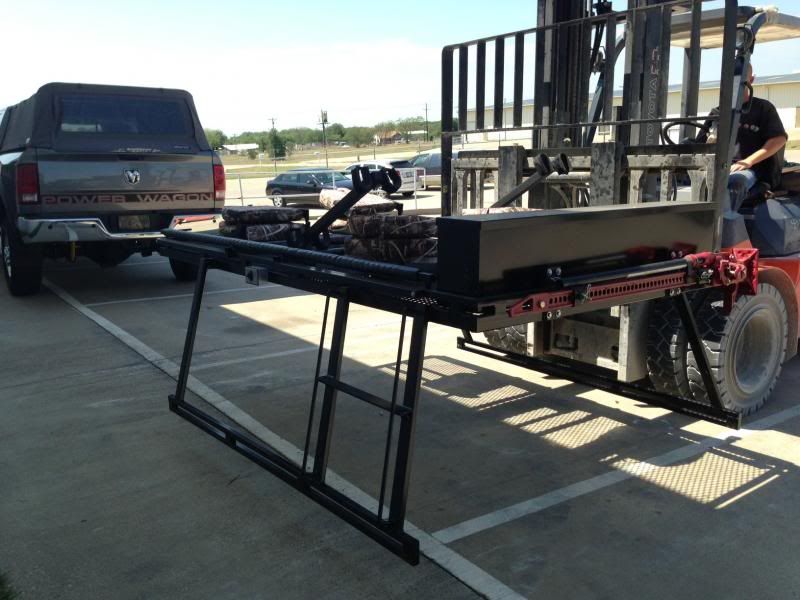
The bed rails I built were run through a heavy metal break so they fit the truck perfect. They are stout enough to bet the rack out far enough to clear the soft topper. I was originally going to use a fiberglass camper top but they all have a skirt around the edge to clean up the appearance with plastic bed caps. This would have interfered with my design and I found the soft topper. The bed rails are also strengthened by using four turn-buckles in the inside of the bed tying the bed rails (high rack bases) to the truck not allowing them to twist or put too much stress on the top of my factory sheet metal.


As cool as it looks with lights mounted to the high rack I wanted the piece self contained. So I mounted the auxiliary lighting to the front of the truck. We built a custom sheet metal box to fit the high rack that would give us storage for our seat pedestals plus hold a big gel cell battery and an on board charger. there is a flush mounted 110 volt male receptacle on the outside of the box so you just plug in an extension cord and it keeps the battery charged and maintained.
[url=http://s101.photobucket.com/user/rockint/media/powerwagonbedrailsrackoff_zpse8723b39.jpg.html t=_blank]


I needed rear doors for passengers and a vehicle better suited for extended ranges on the highway. I liked the design of the Blazer so I followed that idea with a pick up. Some changes were made and this one turned out better than the last. It is the ultimate varmint hunting truck especially when hunting three to four guys and using the truck year round for other hunting and daily driving. This picture shows the truck when it was almost finished. The front kill basket had a few changes made and had not been powder coated. The shooting rail was raised after a night of hunting and I was playing around in the back yard with the sway bar disconnected (electronically) and the front and rear differential lockers engaged.

Specifications:
2012 Dodge Power Wagon SLT
Garmin based factory navigation
front and rear lockers
factory warn 12,000 lb winch
firestone air bags in rear
Soft Topper canvas soft top to keep gear dry in bed
Randy Ellis light bar with 4 light force 170's
Custom Kill basket
Custom High Rack
Custom Battery and storage box
This picture is after everything was finished and the rail was taken down. It takes about 5-10 minutes to take the rail down. The Blazer needed two people to raise the rail. On the design of this rail I made each end pivot so it could fold up and down independently. The side rails are then bolted on for a 360 shooting rail. It makes a shooting rail that is super sturdy when up but compact when down. Once each end piece is folded down towards the middle the side rails bolt to the pivot points locking it all in place.

These pictures show the rail down a little closer up


It is nice to be able to take the rail up and down as needed during hunting season. I drive the truck deer hunting, bird hunting, and for daily use. I need to lower the rail to pull in the shop. I can also take the rack completely off during the summer in about 10 minutes with either a fork lift, a hoist, or 4 friends.


The bed rails I built were run through a heavy metal break so they fit the truck perfect. They are stout enough to bet the rack out far enough to clear the soft topper. I was originally going to use a fiberglass camper top but they all have a skirt around the edge to clean up the appearance with plastic bed caps. This would have interfered with my design and I found the soft topper. The bed rails are also strengthened by using four turn-buckles in the inside of the bed tying the bed rails (high rack bases) to the truck not allowing them to twist or put too much stress on the top of my factory sheet metal.


As cool as it looks with lights mounted to the high rack I wanted the piece self contained. So I mounted the auxiliary lighting to the front of the truck. We built a custom sheet metal box to fit the high rack that would give us storage for our seat pedestals plus hold a big gel cell battery and an on board charger. there is a flush mounted 110 volt male receptacle on the outside of the box so you just plug in an extension cord and it keeps the battery charged and maintained.
[url=http://s101.photobucket.com/user/rockint/media/powerwagonbedrailsrackoff_zpse8723b39.jpg.html t=_blank]
Last edited:


")