

spiderman
New member
I have gotten many nice comments on the camo on my AR and thought this would be a good time of the year for a post and tell how I did it and give you all a summer time project to try .
The camo I have on my AR is from Camo Grafix . Here is their web site.....http://www.camographix.net/patternpage1.htm
The camo comes in sheets you can do you truck ,atv ,gun ,ect. The size I got was a 2' by 3' piece and cost around $40.00 delivered. There are many patterns to choose from . I chose mine because I wanted something with a lot of black in to go with the already black gun and have some bright colors of fall that would hopefully work in the snow .....not as good as real snow camo but as much as possible .
The camo comes in a big tube and you unroll it and cut pieces to fit on the gun and remove a "backer" , then apply to the surface . You have to go slow and stick it down evenly or you will get air bubbles under the camo. These can be worked out easily with a hair dryer .
An AR is quite easy to camo with this method because it has straight lines and round surfaces . The trickest part is the stock as it is strait on top with a straight bottom the is at an angle to the top . The barrel , float tube , and scope have round dementions and it is a matter of just measuring and wrapping the camo.
On the butt stock , I used some paper to make a pattern to help in cutting out the shape.
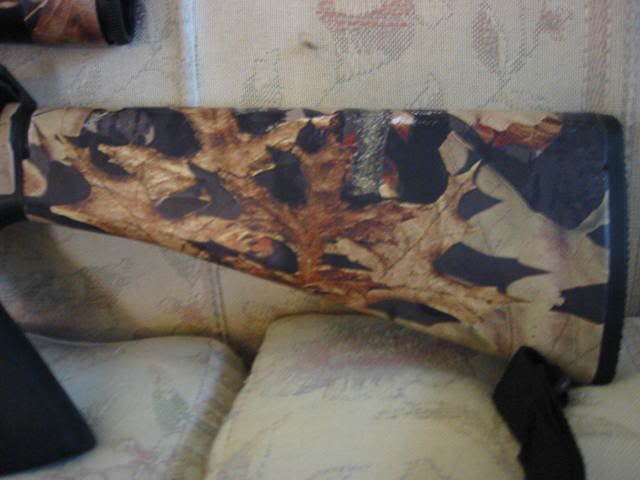
This helps not to waste material as you fit it to the stock. You also get to place the pattern on your material and choose the exact part of the overal camo pattern that will be seen . This is the largest part of the gun surface and you want it to look the best you can . The camo needs to overlap to get a good hold to stay in place so I decided to have the final edge up from the bottom of the stock because the very bottom would get the most abuse and chance for the seam to fail.
Remove the stock from the gun for this part . So with the pattern , place , cut from material leaving the pattern long on each end for trimming after it is applied , and peel the starting edge and get it on the very bottom of the stock.....the overlapping edge is made long by 3/4 of an inch to get a good hold . You work up over the top of the stock peeling just ahead of sticking it down as you go til you get to the very bottom and run your overlap across the starting edge and up the other side the 3/4 of an inch you gave yourself with the pattern . Trim on both ends with a very sharp knife or blade being careful to push down and ahead as you cut to make a good , non frazzled cut .
On the float tube , make your seam on the bottom so it won't show....

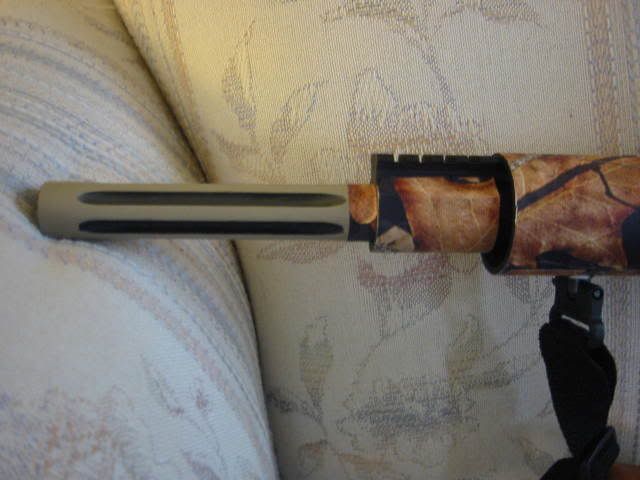
Do the same with the barrel . I have a fluted barrel so I wrapped it and then cut the flutes along their sides but not the ends.....then just pushed the cut material down to the bottom of the flutes with the ends still attached to keep them in place.

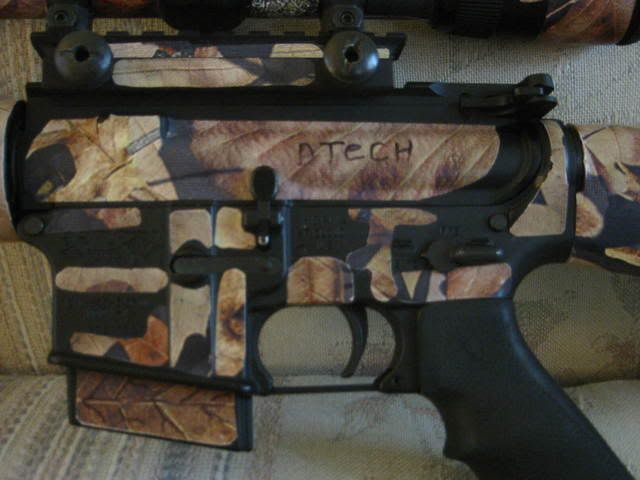
The rest of the gun is a matter of cutting small shapes to fill in on the scope , lower receiver , upper receiver, ect.
To finish the barrel , I did an extra wrap of material an inch wide at the barrel tip and in front of the gas block.
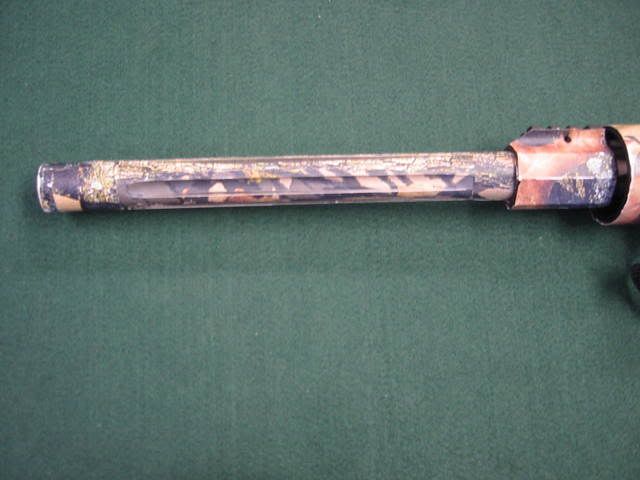
This is to make it more durable and withstand the un-natural power and speed of the .204 . My rifle is also comped so it needed some art work around the ports to allow the gases to escape .
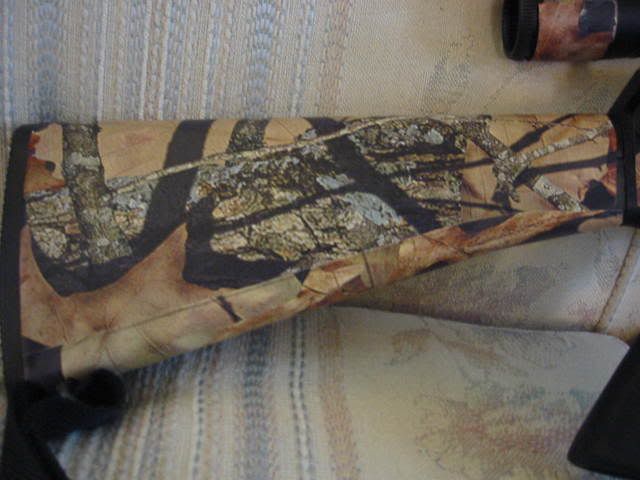
It is not hard to do , just takes some time and patients. The small pieces that you use to fill in the receivers are cut round on the corners to help keep from loosening from use . With the black gun , use as much light color on the black to make it show up.....My son's AR was done by him with the same sheet of camo and you can see if you use dark colors on the black , you camo won't show up as good.
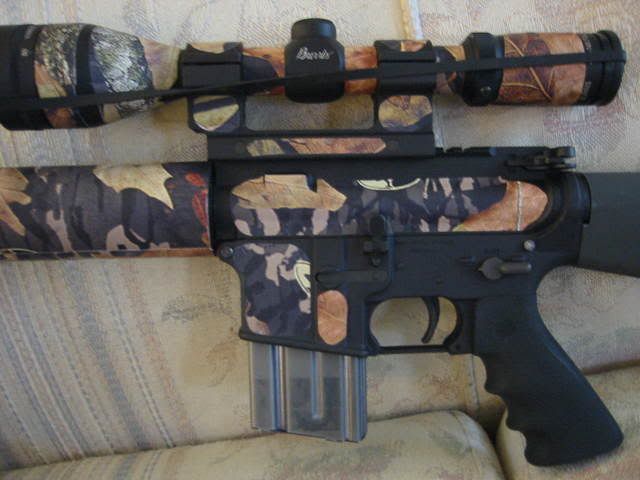
This is my first time to work with this product and I had to learn as I went and after I mentioned the color "thing" to him , he saw the difference. You need to look from afar to see what you are getting .
He started with a skeleton stock and now has purchased an A2 stock for his rifle and will camo it when he gets out of the Navy in a couple of months. Here are the guns side by side . His is also a Dtech he purchase from a PM member in the adds . It is a .223 ,20 inch barrel , fluted .
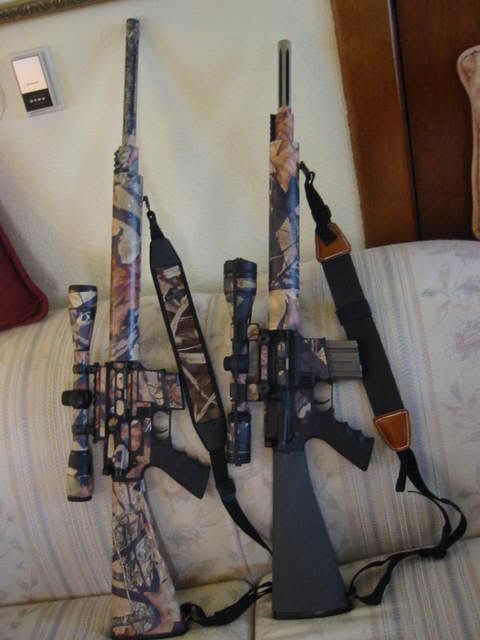
He chose to paint his barrel and used Krylon camo paint from Wally World . He sprayed in on some scrap paper and used a small brush to apply . He make the flutes alternate black and green with the top surface of the barrel tan .
Here is a picture of what I have left of the material from one and a half AR's . Enough to do his A2 stock and more.......two ARs easily from the one 2'by 3' piece . Three AR's would stretch you abilities but might be done.

If you want it off , remove and clean some "sticky" off and you are back to black , or remove and get dipped when you decide on a pattern for "good" . Camo one AR for around 15 to 20 bucks.....it a good deal as far as I see it. I have had mine done since December and it is May now . I took it hunting a lot , to the range , and load shooting at home . If it gets a lot of abrasion in one spot, you can take the color off the surface and it is white underneath. A colored marker and it goes away. It protects the surface of my gun and scope from scratches as well as looking good. If a part gets too bad....hair dryer and replace with new I have left.
No , I am not selling the stuff or have stock in the company ........just giving you all my experience with it and you can make up your own minds about it. I am on the first covering and it has held up good so far for me.....
Questions??????? SM
The camo I have on my AR is from Camo Grafix . Here is their web site.....http://www.camographix.net/patternpage1.htm
The camo comes in sheets you can do you truck ,atv ,gun ,ect. The size I got was a 2' by 3' piece and cost around $40.00 delivered. There are many patterns to choose from . I chose mine because I wanted something with a lot of black in to go with the already black gun and have some bright colors of fall that would hopefully work in the snow .....not as good as real snow camo but as much as possible .
The camo comes in a big tube and you unroll it and cut pieces to fit on the gun and remove a "backer" , then apply to the surface . You have to go slow and stick it down evenly or you will get air bubbles under the camo. These can be worked out easily with a hair dryer .
An AR is quite easy to camo with this method because it has straight lines and round surfaces . The trickest part is the stock as it is strait on top with a straight bottom the is at an angle to the top . The barrel , float tube , and scope have round dementions and it is a matter of just measuring and wrapping the camo.
On the butt stock , I used some paper to make a pattern to help in cutting out the shape.
This helps not to waste material as you fit it to the stock. You also get to place the pattern on your material and choose the exact part of the overal camo pattern that will be seen . This is the largest part of the gun surface and you want it to look the best you can . The camo needs to overlap to get a good hold to stay in place so I decided to have the final edge up from the bottom of the stock because the very bottom would get the most abuse and chance for the seam to fail.
Remove the stock from the gun for this part . So with the pattern , place , cut from material leaving the pattern long on each end for trimming after it is applied , and peel the starting edge and get it on the very bottom of the stock.....the overlapping edge is made long by 3/4 of an inch to get a good hold . You work up over the top of the stock peeling just ahead of sticking it down as you go til you get to the very bottom and run your overlap across the starting edge and up the other side the 3/4 of an inch you gave yourself with the pattern . Trim on both ends with a very sharp knife or blade being careful to push down and ahead as you cut to make a good , non frazzled cut .
On the float tube , make your seam on the bottom so it won't show....
Do the same with the barrel . I have a fluted barrel so I wrapped it and then cut the flutes along their sides but not the ends.....then just pushed the cut material down to the bottom of the flutes with the ends still attached to keep them in place.
The rest of the gun is a matter of cutting small shapes to fill in on the scope , lower receiver , upper receiver, ect.
To finish the barrel , I did an extra wrap of material an inch wide at the barrel tip and in front of the gas block.
This is to make it more durable and withstand the un-natural power and speed of the .204 . My rifle is also comped so it needed some art work around the ports to allow the gases to escape .
It is not hard to do , just takes some time and patients. The small pieces that you use to fill in the receivers are cut round on the corners to help keep from loosening from use . With the black gun , use as much light color on the black to make it show up.....My son's AR was done by him with the same sheet of camo and you can see if you use dark colors on the black , you camo won't show up as good.
This is my first time to work with this product and I had to learn as I went and after I mentioned the color "thing" to him , he saw the difference. You need to look from afar to see what you are getting .
He started with a skeleton stock and now has purchased an A2 stock for his rifle and will camo it when he gets out of the Navy in a couple of months. Here are the guns side by side . His is also a Dtech he purchase from a PM member in the adds . It is a .223 ,20 inch barrel , fluted .
He chose to paint his barrel and used Krylon camo paint from Wally World . He sprayed in on some scrap paper and used a small brush to apply . He make the flutes alternate black and green with the top surface of the barrel tan .
Here is a picture of what I have left of the material from one and a half AR's . Enough to do his A2 stock and more.......two ARs easily from the one 2'by 3' piece . Three AR's would stretch you abilities but might be done.
If you want it off , remove and clean some "sticky" off and you are back to black , or remove and get dipped when you decide on a pattern for "good" . Camo one AR for around 15 to 20 bucks.....it a good deal as far as I see it. I have had mine done since December and it is May now . I took it hunting a lot , to the range , and load shooting at home . If it gets a lot of abrasion in one spot, you can take the color off the surface and it is white underneath. A colored marker and it goes away. It protects the surface of my gun and scope from scratches as well as looking good. If a part gets too bad....hair dryer and replace with new I have left.
No , I am not selling the stuff or have stock in the company ........just giving you all my experience with it and you can make up your own minds about it. I am on the first covering and it has held up good so far for me.....
Questions??????? SM


