Do it yourself Skulls

Yellowhammer

Moderator
Staff member
Every wonder what to do with your trophy's, or get tired of paying more than you are willing or can afford getting your skulls done?

"European" mounts have gotten to be very popular, especially seeing how how it has gotten to have a deer shoulder mount done.

Europeans have now gotten to be huge amount of most taxidermist business and run in the neighborhood of $150 bucks, which is cheap compared to the $500-$650 a good shoulder mount will cost.

The same goes if just want to keep a few skulls from your predator hunting exploits.

I just got through doing a few, and I thought I would pass on some tips and pictures to show you what you can expect.

I will start with some pictures of what they looked like to shart with.

Last year, I took this 7.5 year old buck. He wasn't a trophy by B&C standards, but was a wiley old buck worth the respect of going on the wall.

OldMan2011.jpg


Then this year, I took a couple of big boars with some very nice cutters:

bigboar9-28-12.jpg


boarteeth9-28-12.jpg


bigsmyrnaboar12_zpscae6e088.jpg


boarcutters_zpsfc2a3b18.jpg


Then, last week, my son took this 5.5 year old buck.

Hunterbuck12.jpg


Getting Hunter's buck ready for him to put on the wall is really what got me busy getting this done, as I had been procrastinating on the others.

In the next post, I will show some pictures and discuss the procedures, equipment and supplies needed to get the final product you want.
 
Last edited:
I thought about doing this little tutorial AFTER I had already gone through the process, so I do not have pictures of all of the steps, but I will try and fill in some of those later.

The first thing you will need to do with any skull, is completely skin the head and remove as much meat and fat as possible.

There are at least 2 methods to prepare a skull: demestid bettles and boiling (edit: as mentioned below, a hard boil is not the best way, more a slow simmer where the water is just barely bubbling, but I usually just call it "boiling", and when you read that below keep this in mind).

I will be illustrating the latter, and will be the most doable for most people.

After skinning the head and removing as much meat as possible, you are ready to boil it.

I don't recommend doing this in the house, unless you are trying to get rid of the woman in your life. If you are, then by all means.

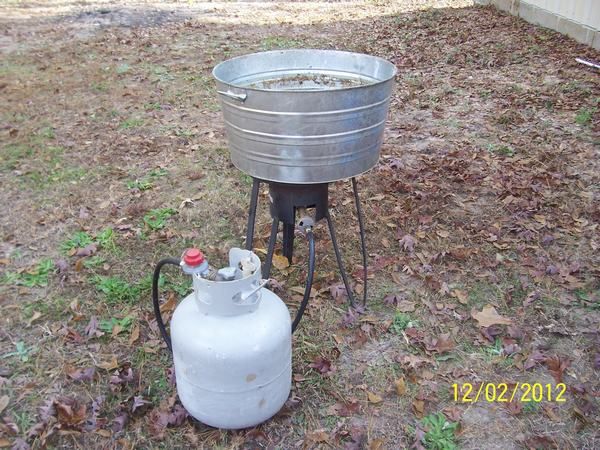
I use a fish fryer and was tub from the local hardware story.

100_5325.jpg


Fill the tub with water before you light the burner or you will burn a hole in the thin tub or at least blacken the bottom. If you are going to be doing a deer, elk or something like that, I suggest using a string or something to keep the antlers themselves up out of the water as you don't want to take away the natural coloration of the antlers.

You will also need a few supplies for the boiling and for whitening the skulls after boiling.

100_5326.jpg


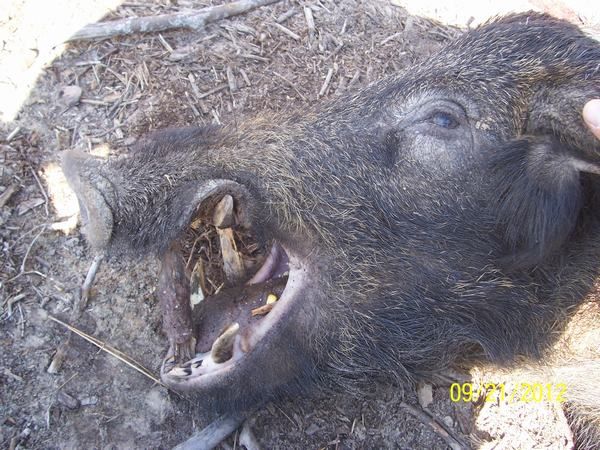
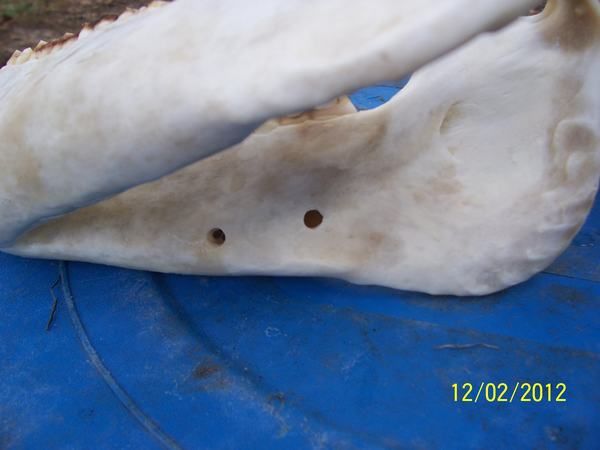
Putting Dawn dish soap into the boiling water will help degrease the skulls during boiling. If doing bears or especially hogs I recommend drilling some small holes in the inside of the jaw before putting them into boil.

The other two ingredients you see above are 40 percent hydrogene peroxide CREME rinse, (the creme is much thicker and coats the skulls better) and a product called Quick White which is a power. Both are available at your local beauty supply store. Anything over 40% is only available to licensed beauticians. I will talk about these more when we get to the whitening process.

Below you can see where I drilled the holes to allow the fat to boil out of the jawbone.

100_5332.jpg


The inside of the jaw contains a lot of fat that will stain the skull and will continue to leech out of the bone over time.

There is also a couple of ways to do your deer skulls. One is to take a saws all and cut the bottom of the skull off flat. This will make it easier to clean out the brain and sinus, and will also allow the skull to lay flat on a plaque. The other is to just leave the skull intact with all of the upper jaw teeth.

100_5329.jpg


100_5328.jpg


I will usually boil the skulls for about 4 hours, less for small skulls like coyotes, fox or bobcats. For small skulls, I will usually also use a smaller pot, but remember if you do, to be sure and check the water often. I learned this the hard way once and went off and left the pot burning and after forgetting about it several hours later I found I had cremated my skulls except for the set of antlers which were saved because they were being suspended by the string. In a small pot the water will evaporate faster than you think.

Remember after the boiling (simmering) is over to carefully pour off the water because you do not want to loose any teeth that have fallen out of the skull. If I am doing small skulls with small teeth, I will only do a couple at a time so that I can keep up with the teeth. Also be carefull with the nose portion of deer as they are fragile, especially when you are trying to remove the cartilage in the nasal cavity.

In the case of large skulls like hogs or elk it is best to boil (think simmer) the skull for a few hours and then remove as much of the meat and membranes as possible. Then soak the skulls in a bucket or barrel of clean tap water for 2-4 weeks to allow the rest to rot off. This really helps get the sinus junk to turn loose. After the soak, boil or simmer the skulls again for a couple of hours.

When you get to the this point, it really helps to have a good knife, a small wire brush, and a air compressor spray attachement to blow out the sinus cavities and little crevices. A little air powered wire brush works good too.

Especially on hogs, you need to pull the cutters and whetters as they will have a good bit of meat inside the teeth. The cutters usually have as much tooth inside the jaw as there is sticking out of the jaw. You will often see where a taxidermist has "pulled" the cutters to make them appear much longer than they actually were. This can usually be determined by noting the gum line on the teeth.

Once you have the skulls as clean as you can get them, you are ready for the whitening. I poured up about as much 40% creme as I thought it would take to cover my skulls into a plastic cofee can and then added about a table spoon of the quick white. I made the mistake of not putting on some latex surgical gloves before handling, and the quick white rapidly begn to burn MY skin. Once I had the quick white stirred up in the creme rinse, I painted it onto the skulls with a small paint brush taking care not to get it on the antlers or the teeth of the deer or hogs as I wanted to keep the natural "black" on the teeth.

The smaller skulls and jawbones, I just dipped into the can and then let the excess drip off. Then I wrapped the skulls in plastic grocery bags. Plastic wrap will also work well. I then let them sit overnight. The plastic keeps the peroxide from evaporating and working on whiting the skulls.

After they have set, you are then ready to wash off the skulls and gently scrub them with a plastic bristle brush to get the last remaining tissue off.

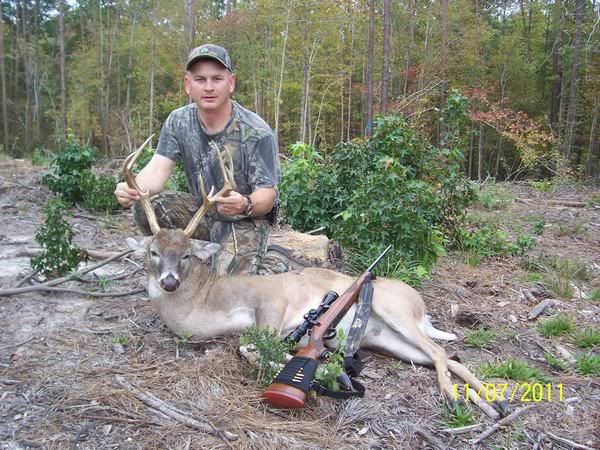
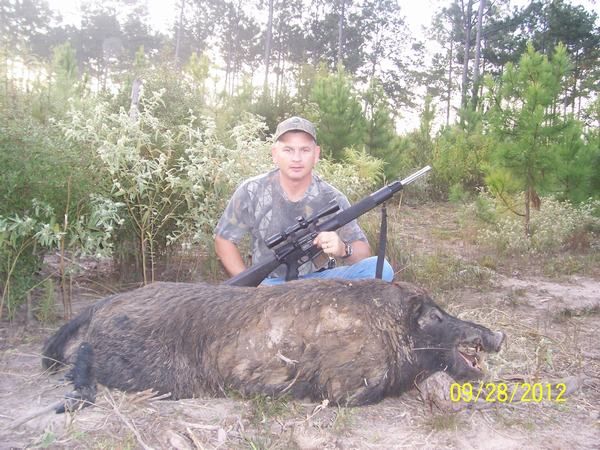
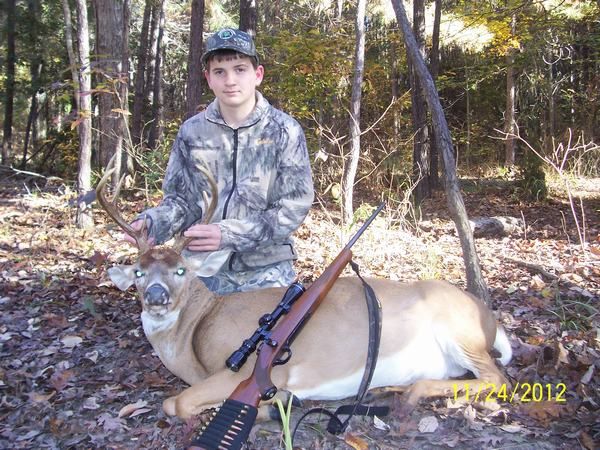
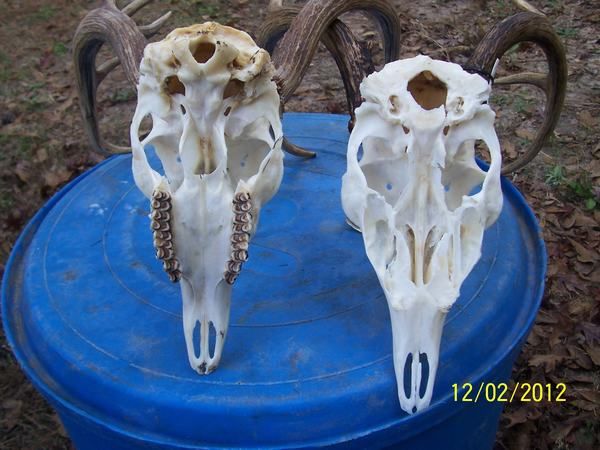
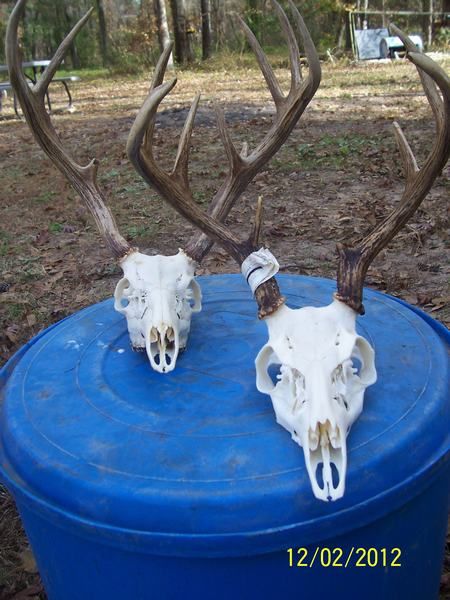
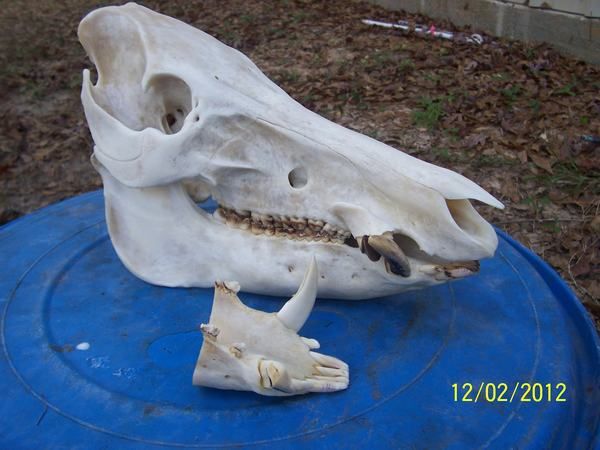
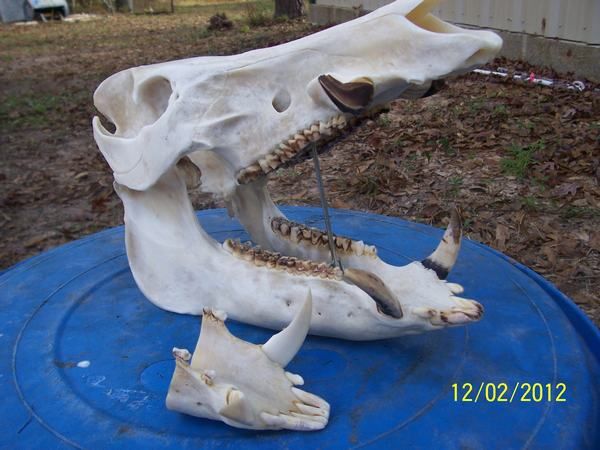
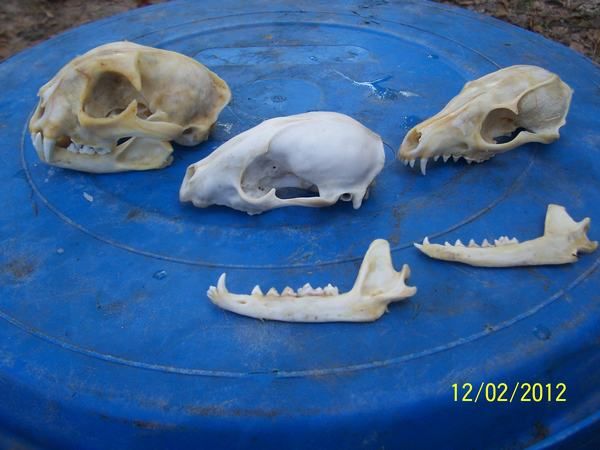
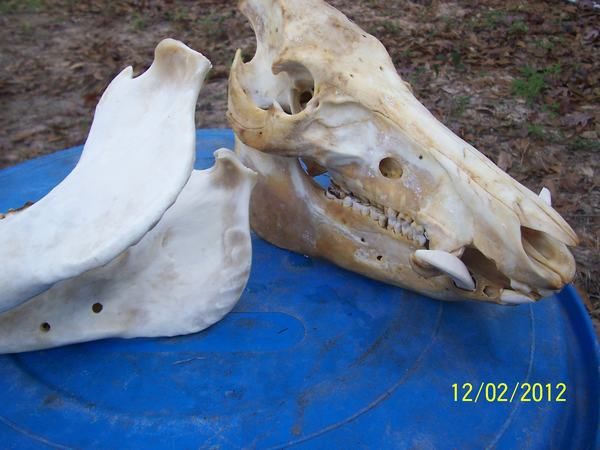
I have found that the longer you wait between the boiling and the whitening, the harder it will be to get them clean. In the following pictures you will see a bobcat and fox skull that I actually boiled back in the spring, but didn't try to whiten until this weekend. My buck from last year was boiled last November and not whitened until this weekend. The big hog was taken out of the freezer a couple of weeks ago and boiled and then had been soaking in a barrel of water the last two weeks.

Hunter's buck was killed last Saturday, boiled a few days ago (along with the boar skull that had been soaking in the barrel) and they were all whitened at the same time.

You will see that Hunter's buck turned out whiter than the buck that I boiled last year but didn't whiten until now. You will also see that the big hog turned out great, while the predator skulls didn't turn out as white.

The smaller hog skull that you see was boiled several years ago, and no effort was ever made to whiten it until now. I also didn't drill holes in the jawbone, so you will notice how the fat has leeched out and yellowed the skull, and the whitening process didn't do nearly as well on it.

 
Last edited:
Here are the finished deer skulls:

100_5327.jpg


Here is the finished boar skull:

100_5330.jpg


The whole skull is the boar pictured with the smaller sow, and the front lower jaw is the other boar. I simply took a hack saw and sawed off the lower jaw. I think I am going to start doing this on all the boars that have any kind of cutters. You don't need a ton of skulls laying around if you kill a lot of boars, but you can quickly cut off the lower jaw, and I think this will make a great way to display them. I am going to get an old barn board and mount them coming out of the board.

Even on really big boars, the whetters are usually not that impressive, and this will be a quick way with little work to show off a trophy.

100_5331.jpg


Now all I have to do is glue in the loose teeth. This will be done with some old fashioned white Elmer's Glue.

On a lot of small skulls like coyote, bobcats, fox and coons the lower jaw will separate at the front. This will require you gluing the jawbone back together at the seam.

You will notice that the predator skulls that I boiled back in the spring but didn't whiten until this weekend, did not turn out nearly as well as Hunter's buck, or the large hog skull which had little time between boiling and whitening.

100_5335.jpg


The bobcat is on the left, a coon in the middle and the gray fox on the right with the two sides of the fox jawbone that will need to be glued together.

In the below picture, you can tell the difference in the whiting of the hog skull that was boiled several years ago (without the jawbone being drilled) and the recently boiled hog skull.

100_5333.jpg


The yellowing of the skull by the leeched out fat is something that will be difficult of deal with.
 
Last edited:
Not trying to hijack your thread, but I've found that by simmering the skulls as opposed to boiling keeps more of the connective tissue intact and doesn't weaken the bone. Less gluing later.
 
Originally Posted By: PlaisanceNot trying to hijack your thread, but I've found that by simmering the skulls as opposed to boiling keeps more of the connective tissue intact and doesn't weaken the bone. Less gluing later.

I agree we usually do too shorter simmers/boils but use the same ingredients. Boiling too hot too long with a deer skull we usually have trouble with the nose separating a bit.
 
Finished the deer last week and was boiling yesterday's coyote when I read this post. Went and added the dawn, sounds like a nice add to the process. I'll look for more good additions when you get home and may post some pics when you are done. Thx
 
I like hair bleach (40%). Paint it on, wrap the skull in plastic wrap, and set in the sun for a few hours, then rinse off. Everyone has a slightly different method of doing euros. Whatever way is easiest. But no latter what you should NEVER use laundry bleach on a skull.
 
Originally Posted By: 5spdIve been boiling/cleaning (simmering) my skulls for years...in the house!

Been down that road...once.
 
Maceration is what I was doing with the hog skull by soaking it in the barrel the last couple of weeks.

By boiling (or simmer if you prefer that terminology) the skull first to get as much meat off as possible, you can speed up the process.

If you stick a full hog skull in water without boiling it first it will take a long time before it is ready and stinks more than a little bit.

Deer skulls or predator skulls can be boiled and whitened about 2 days where it will take weeks to do the same thing by maceratation. But, it is an effective way to go if you choose.
 
I boil/simmer out my own skulls too. I was taught by a friend who does this 40-50 times a year for a taxidermist and he says it is important to get most of the brain out of the skull before boiling as the brain will put a lot of grease into the water right off the bat. I use Arm & Hammer laundry powder and use one scoop(the one in the box) in the water. It turns the meat and tendons into a rubbery substance that is easily pulled or scraped off. Takes about 2 1/2 hours to do and only half that time is picking and scraping. I have been using the 40% liquid peroxide and letting it soak for a day but it is hard to get the top of the skull white without getting the horns. I am going to try the 40% creme and the white powder mix to put on the skull top and around the horns next time. Pretty easy and the laundry soap kills the smell. Add a little dish soap to cut grease on hogs and bears. Good luck!!
 
Very good stuff here guys. I'm a little different though, as I like a little of the dark color left on it. I just feel like if you get them perfectly white it looks like a fake plastic one you can go buy at walmart. Just my opinion, I like a little character left in my skull.
 
Good thread. I have been doing my own Euro mounts for years. Like the mention of Arm & Hammer, I use a similar type of laundry soap. I also use the peroxide.

As some mentioned, my wife and I prefer a little more mellowing to the final product so that is not quite as 'stark' white........... to achieve this I put the skulls out in the sun and wind for a few days.

I did a big old trophy wood bison bulls skull a couple of years ago. As soon as the horns would slip I took them and set them aside and finished the skull. Left it outside for a few weeks on top of the roof of my wood shack. It turned a beautiful off white and I then replaced the horn sheaths. In the end I was really please with the results.

I outfit for black bear and my wife and I are ardent bear hunters, so we do all our own bear skulls and some for friends. They are very fatty and you need to do a good job in the first instance of you will get leaching and fat staining down the road.
 
Back
Top